The Availability Settings in Simpech allow instructors, admins, and even students (if enabled) to control available time slots. This facilitates easier scheduling and informs others of your availability for classes, sessions, or meetings.
To set up your availability, follow these steps:
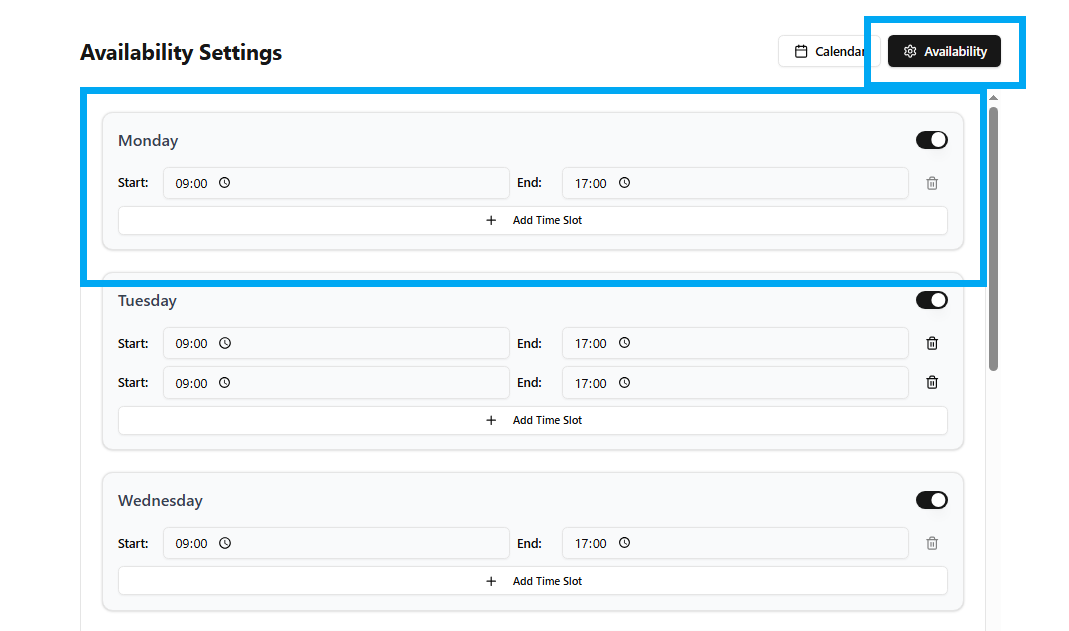
Step 1: Open the Availability Settings
From your dashboard, go to the Calendar section.
In the top-right corner, click the Availability button.
This will bring up the Availability Settings page.
Step 2: Choose the Day
Every day of the week is listed individually (Monday, Tuesday, Wednesday, etc.).
You can toggle the switch (on the right-hand side of every day) to turn on or off availability for a particular day.
Step 3: Set Start and End Times
For every day, enter your Start Time and End Time in the respective fields.
This sets the time window when you are available for sessions.
This section displays your current availability slot for the chosen day. You can define the time range here, and turn it on/off according to your needs.
Step 4: Add Multiple Time Slots

At times, your availability might not be a block of time (e.g., morning and evening).
Click "+ Add Time Slot" below a day's availability.
A new row will be displayed, allowing you to set an additional start and end time.
Step 5: Save and Apply
Once you've entered your desired times, ensure each of the slots is turned on.
Your availability is established, and other users can see or book sessions accordingly.
Why Availability Settings Are Helpful
Improved scheduling: Avoids double-booking and guarantees sessions occur during your spare time.
Flexibility: Insert multiple slots to accommodate other obligations.
Clear communication: Your students and colleagues immediately notice when you're free.
By following these simple steps, it is easy to handle your timetable and gain the most from the Simpech Virtual Classroom.